In this project, I'll build on my previous post on reading breath pressure into an Arduino or Arduino clone. We'll use the same circuit from that post, and write some new code that maps the sensor values we read to a MIDI continuous controller (which I'll refer to as a CC from here on out). That CC data will, in turn, control a parameter of a software synthesizer.
What's a MIDI CC?
MIDI continuous controllers are a standard way for performers to modify the sound produced by the synthesizers they are playing. The "continuous" part of the name means that the values sent on the MIDI bus control some parameter with a range. If you've played a MIDI keyboard that has a modulation wheel:
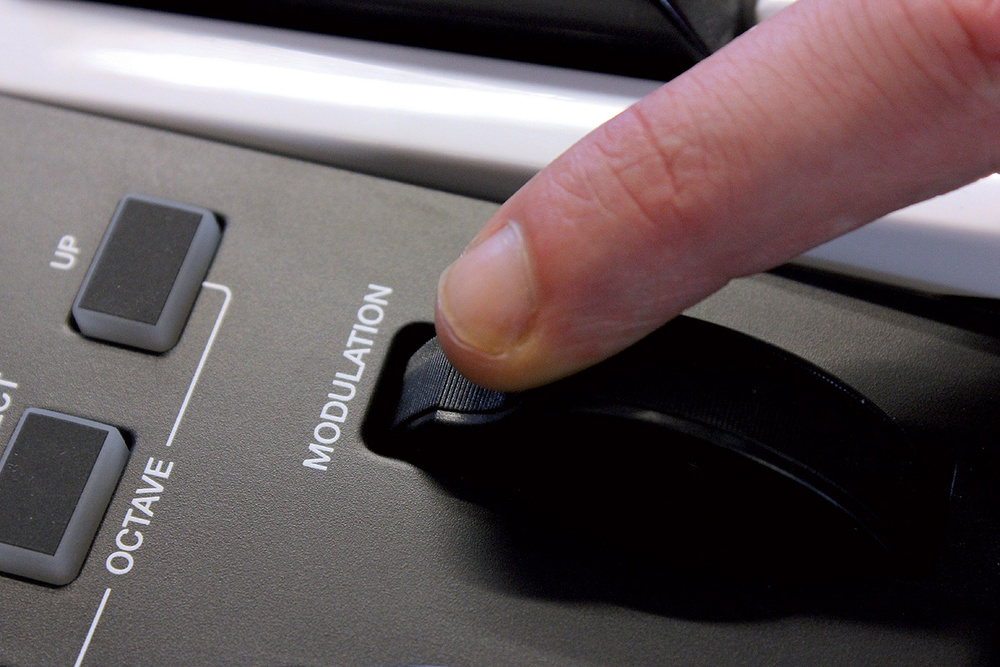
you know that the more you turn the "mod wheel", the more vibrato you hear, at least with most common synth patches. In the following example, I play a chord, and turn the modulation wheel from zero to full on, then back to zero.
If you dig into the MIDI spec, you'll discover that the mod wheel is only one of many continuous controllers defined. Each one has a unique number assigned to it, and some have a name, like "Modulation Wheel" or "Pan". The controller name describes what type of control is typically going to generate that data. On a traditional MIDI keyboard, if you move the mod wheel, you'll generate Continuous Controller 1 data.
If you think about it, there are many real-life things that naturally can be expressed as a continuous controller: How far you have twisted a knob. How far to the left or right your are tilting your hand. How far apart your hands are. Or how hard you are blowing air. All of these things can be mapped to some number that ranges from some minimum value to some maximum value (provided you can measure them and translate them to MIDI).
The MIDI spec states that continuous controller values vary from a minimum value of zero to a maximum value of 127. This means CC values have 7 bit resolution, which, for some applications, is not acceptable - the results sound odd. I'll talk about those later, but for many of the common synthesizer parameters that are controller by CCs, 7 bits is fine.
How the Pressure Sensor Works
Before we get into wiring up and coding the project, let's dive into how the Freescale pressure sensor works. It relies on something called the Piezoresistive Effect.
There are some materials that exhibit the property that, as you press on them, the resistance through the material changes. The Freescale sensor has a small piece of this type of material inside, and when the pressure inside the case of the sensor increases, the resistance through this material changes. The sensor also has circuitry to amplify the signal and make it work consistently even if the temperature varies.
Advances in chip fabrication techniques have allowed manufacturers to make these type of sensors in very small packages. By contrast, the Yamaha WX-7, a 1980s-era wind instrument controller, has a breath sensor that is much larger than the Freescale sensor used in this project. Although I don't know how the WX-7's pressure sensor works, I suspect it's based on the same principle.
Mapping Sensor Values
We'll now build on the circuit in my previous post and generate MIDI continuous controller data based on how hard a performer is blowing into the breath sensor.Remember that our Arduino's analog inputs convert the values they read into a value that varies between 0 and 1023. But the MIDI spec wants you to provide values between 0 and 127. What to do?
Well, the math is pretty simple. Just divide the value read from the input by 1024, and multiply it by 128. But the arduino library has a nice convenience function named map() that does exactly this. For example:
  int sensorValue1 = analogRead(A0);
  int ccVal = map(sensorValue1, 0, 1023, 0, 127);
The code snippet above will linearly map values in the range 0-1023 to values in the range 0-127.
Generating MIDI CC Values
The PJRC USB MIDI support makes sending MIDI data over USB just ridiculously simple. From the PJRC USB MIDI reference:usbMIDI.sendControlChange(control, value, channel)
Where "control" is the MIDI controller to change, "value" is the mapped sensor value, and "channel" is the MIDI channel on which to send the data. Although we haven't talked about MIDI channels yet, for these exercises we'll send the data on MIDI channel 1 and then make sure that our MIDI synthesizers are either set up to listen on channel 1 or are set to "omni" mode, in which they respond to MIDI data on any MIDI channel.
Our First, and Imperfect, Sketch
#define MOD_WHEEL_CONTROLLER 1
#define MIDI_CHANNEL 1

// The value read from the sensor
int sensorValue;
// The CC value we will send
int ccVal;

void setup() {
  // Nothing to initialize for this sketch
}

void loop() {
  // read the input on analog pin 0
  sensorValue = analogRead(A0);
  // Map the value, which may range from 0 to 1023,
  // to a value in the range 0 to 127, which is
  // the valid range for a MIDI continuous controller
  ccVal = map(sensorValue, 0, 1023, 0, 127);
  // And send the value as a MIDI CC message
  usbMIDI.sendControlChange(MOD_WHEEL_CONTROLLER, ccVal, MIDI_CHANNEL);
}
To load this sketch, first go to the "Tools" menu and choose "USB Type" and select "MIDI". Then click on the upload button.
Once you've loaded the sketch, you'll need to load a software synthesizer host on your Mac/PC/Linux box. While I can't cover every possibility in this post, I'll cover the basic steps for running Garage Band on a Mac and getting mod wheel output from our circuit.
- Start Garage Band.
- If a project opens automatically, choose Close from the File menu and choose New Project...
- Select the Keyboard Collection template and give the project a name in the dialog that appears.
- In the list of instruments that appears, click on "80's Sync Lead" - it's an interesting-sounding synth that responds to mod wheel input.
- Select Musical Typing from the Window menu. A window appears where you can click on a virtual MIDI keyboard.
- If your Teensy controller isn't plugged in, plug it in now. When you plug in a MIDI-USB device, GarageBand should pop up a window informing you that the number of MIDI inputs has changed.
- Click and hold down the mouse button on a note in the Musical Typing window. In the sound sample below, I clicked and held the "F" key.
- You should be hearing a synthesizer playing a note now. Keep holding the mouse button and blow into the tube connected to your pressure sensor. Start blowing gently, blow harder and harder, then gradually blow less and less.
- You should hear something about like this
And if you double-click the segment you just recorded, and select "Modulation" from the "View" menu, you can see a graph of the values the Teensy sent.
Pretty cool, huh? Actually, no, there are two serious problems with my sketch.
Shut Up, Already!
Notice that we send a MIDI CC value every time the the loop() method is called. This means that you're spamming the MIDI instruments as fast as your microcontroller can make it through its loop() method. This is not good because (a) the MIDI bus has a finite bandwidth, and (b) you can overload software synthesizers with this data, as they try to adjust internal parameters in real time.There are two approaches I can think of to address this problem:
- Only send a new CC value if a certain amount of time has passed, e.g. 20 milliseconds, or
- Only send a new CC value if the new value is different from the previously sent value to be interesting to the synthesizer.
#define MOD_WHEEL_CONTROLLER 1
#define MIDI_CHANNEL 1
// Send continuous controller message no more than
// every CC_INTERVAL milliseconds
#define CC_INTERVAL 20

// The last time we sent a CC value
unsigned long ccSendTime = 0L;
// The value read from the sensor
int sensorValue;
// The CC value we will send
int ccVal;

void setup() {
  // Nothing to initialize for this sketch
}

void loop() {
  // read the input on analog pin 0
  sensorValue = analogRead(A0);
  // Map the value, which may range from 0 to 1023,
  // to a value in the range 0 to 127, which is
  // the valid range for a MIDI continuous controller
  ccVal = map(sensorValue, 0, 1023, 0, 127);
  // And send the value as a MIDI CC message
  if (millis() - ccSendTime > CC_INTERVAL) {
      usbMIDI.sendControlChange(MOD_WHEEL_CONTROLLER, ccVal, MIDI_CHANNEL);
      ccSendTime = millis();
  }
}
Don't Send Useless Data
The other problem is that, even when you aren't blowing into the tube, it's sending data to the MIDI instruments. If no air is going through the tube, then why send any data at all?This is pretty easy to fix. Recall that, even when no air was being blown through the tube, it produced a voltage that the analog-to-digital converter on the Arduino interpreted as about 64. So, if the value we read from the input port is less than about 70, let's just not send anything at all. Problem solved.
One subtle issue is that when the pressure falls below the threshold value, we need to send a zero value. Otherwise, when you stop blowing, the controller would remain at the last value we sent, rather than zero. We handle this in the last else clause.
#define MOD_WHEEL_CONTROLLER 1
#define MIDI_CHANNEL 1
// Send continuous controller message no more than
// every CC_INTERVAL milliseconds
#define CC_INTERVAL 20
// Only send CC data if the pressure sensor reading
// a value larger than this.
#define BREATH_THRESHOLD 70

// The last time we sent a CC value
unsigned long ccSendTime = 0L;
// The value read from the sensor
int sensorValue;
// The CC value we will send
int ccVal;
// The last CC value we sent
int lastCcVal = 0;

void setup() {
  // Nothing to initialize for this sketch
}

void loop() {
  // Only read the sensor if enough time has passed
  if (millis() - ccSendTime > CC_INTERVAL) {
    // read the input on analog pin 0
    sensorValue = analogRead(A0);
    if (sensorValue > BREATH_THRESHOLD) {
      // Map the value, which may range from BREATH_THRESHOLD
      // to 1023, to a value in the range 0 to 127, which is
      // the valid range for a MIDI continuous controller
      ccVal = lastCcVal = map(sensorValue, BREATH_THRESHOLD, 1023, 0, 127);
      // And send the value as a MIDI CC message
      usbMIDI.sendControlChange(MOD_WHEEL_CONTROLLER, ccVal, MIDI_CHANNEL);
      ccSendTime = millis();
    }
    else if (lastCcVal > 0) {
      // The pressure has just dropped below the threshold, so
      // send a CC value of zero
      usbMIDI.sendControlChange(MOD_WHEEL_CONTROLLER, 0, MIDI_CHANNEL);
      ccSendTime = millis();
      lastCcVal = 0;
    }
  }
}
Another thing you can do with this code is convert it to a MIDI Breath Controller and do cool stuff like in this video:
You can build that For about $36.
Next
In the next post, I'll show how to use the pressure sensor to manage MIDI Note On and Note Off events, which will allow us to articulate like a woodwind or brass player does.
Nice. I can't solder and have no experience with microcontrollers, therefore I am using one of these: http://www.tecontrol.se/index_files/USBMIDIBreathController.htm
ReplyDeleteMore at http://www.kvraudio.com/forum/viewtopic.php?t=364700
can i use just the mxvp400gp chip ,to my v-50 Yamaha keyboard breath controllor input
ReplyDeleteafter mounting it to a board ?
To answer that question, we'd need to know what sort of signal the Yamaha keyboard expects to see. Anyone know?
ReplyDeleteSince we haven't gotten any answers here, I'd suggest posting the question to the Yahoo Group "windcontroller@yahoogroups.com". Someone there may know.
ReplyDeleteThank you Gordon Good,i got the repair manual to my Yamaha v-50 keyboard from
Deleteebay,and it is a lot of help they made it nice,lucky find. now i will post question to Yahoo Group.
like you say and thanks again.
I ran across your blog after starting the development of my woodwind controller... Thought you would like to see the video:
ReplyDeletehttps://www.youtube.com/watch?v=ee8yibxfjww
Very cool, Jeff! For those who would like to follow Jeff's excellent work, his journal/RSS feed are here: http://www.jeffmhopkins.com/index.php?p=journal
ReplyDeleteThat's a novel idea of using resistive sensing.
Gordon, very nice work. One question. What happend with the condensed and spite water inside the tube ? Will the water running into the freescale sensor and then on board of the pcb ?
ReplyDeleteThanks, Peter. I am fairly certain the Freescale sensor I used is impervious to moisture, since one of its applications is listed as "Appliance Liquid Level and Pressure". So as long as the seal of the breath tube doesn't leak onto the surrounding circuitry, things should be ok. But you have a good point - a more complete design would need to accommodate the condensation/spit produced by the player. Even technology doesn't do away with spit valves!
DeleteHello Gordon, I've solved the problem for my wind controller project (http://www.matschke.at/?page_id=257). I capsules the breathcontroller into a 3d print mini case and added a little goretex membran. The tubes are connected with a Y-piece so the moisture can flow out of the flute. As pressure sensor, i've used a Bosch BMP085 mini breakoutboard (sparkfun). It has the advantage of temperature compensation and is a very fast and sensitive.
DeleteHave fun
Peter
Thanks, Peter. I've looked at your prototype and I am very impressed. I think the term "finished product" would be more appropriate!
DeleteThanks for sharing the information about the pressure sensor. I can completely understand how a barometric pressure sensor (with its lower pressure range) would be a better choice for an end-blown flute application, with an open end. I'll bet this instrument feels very natural to play for you. Congratulations!
Hello Gordon, nice project, i want to build an breath controller.
ReplyDeleteIs there a possibility to run or adapt your teensy code on/too UNO version? because usbMidi is not possible, (it brings IDE error while undefiniert)
I test it with Serial.write, but nothing is function! Thanks from Germany
Thanks for the compliment!
ReplyDeleteI'm not sure, based on your comment, if you want to be able to connect the USB port on your Uno *directly* to your computer and use it as a breath controller with software like Ableton Live, etc. If that's what you are asking about, then no, that's not very easy. The USB port on the Uno isn't very flexible.
You *can* interface a MIDI application running on an Uno to a MIDI device, but you will need a MIDI shield like the one from Sparkfun: https://www.sparkfun.com/products/9595. Or, you could follow one of the tutorials like http://arduino.cc/en/Tutorial/Midi.
But since the SparkFun MIDI shield costs $19.95 USD and the Teensy 3.1 (which is also available from SparkFun for $19.95 USD) I'd suggest just getting the Teensy.
If you really, really want to use you Uno, and can't afford the MIDI shield, there are ways to wire up the serial output of an Arduino to a MIDI interface - see various tutorials on the web, e.g. http://www.notesandvolts.com/2012/01/fun-with-arduino-midi-input-basics.html
Hope this helps!
-Gordon
Take a look at multi-moca lufa stack. It is designed to be flashed into the 16u2 processor that controls the USB port. If you short pins 4 and 6 on the icsp connector it will present as a regular UNO USB port. If not shorted it will present as a USB Midi in Port.
DeleteHere is the URL to MoreCat Labs:
http://morecatlab.akiba.coocan.jp/lab/index.php/aruino/midi-firmware-for-arduino-uno-moco/?lang=en
Thanks, Charles! To summarize, the software he links to allows the "extra" processor on the Uno, which is normally used for USB-serial communications, to be reprogrammed to be a USB HID device, and it includes the capability to be a USB-MIDI device. That means you can use the Arduino Uno as a USB MIDI controller, as I described in this post, or it could be used as a sound generator, perhaps with a synthesizer shield.
ReplyDeleteI'd like to make a midi wind instrument/controller. Not sure if there is enough info here to help. I'm also new to micro controllers. Also don't know if the code will work with the teensy 3.1 or how to change it. I have written down what I want it to do, but not sure how to do it. Can you help me with my project?
ReplyDeleteHi Brian,
DeleteSure, I'd love to help. Since you're new to microcontrollers, I'd suggest doing some more simple projects to make sure you understand the concepts you'll need to build more complicated projects like a wind controller. What sort of programming experience do you have?
And yes, the examples should work fine on the Teensy 3.1.
My suggestion would be to set up your own blog, and post the written notes you have about what you'd like to build. I'll bet you get some good suggestions (I'll chime in).
I think there is a slight problem with teensy 3.1 because of all analog-only pins are 3.3V only. And MPXV4006GP supply is 5V and output is also 5V.
DeleteTechnically, yes, I think we should be using a 3.3v part or level-shifters, but it seems to work ok.
ReplyDeleteHi Gordon, You stated that we could build a MIDI Breath Controller like the "New -Type Breath Controller" in that video by Tatsuya Nishiwaki for about $36.00. Would you be interested in making one for me and giving me a price? ....LOL
ReplyDeleteSorry, I don't want to start a manufacturing business :-)
DeleteThere is a commercial breath controller available the does everything mine does. See http://tecontrol.se/products/usb-midi-breath-controller
Thanks Gordon, I'll check in to that. Keep up the good work!
ReplyDeleteHi there! have you got a video of it working? thanks! ps: How much will it cost?
ReplyDeleteHi Gustavo, no video, but it wouldn't be all that exciting. The sound clip in the post illustrates what it can do. Total cost would be about 36 USD.
ReplyDeleteHi do you sell a complete unit
ReplyDeleteHi thestudio49 - no, I've never gone that extra step. There are some others who have developed complete units you can buy, or of course, you could look at one of the commercial offerings from Akai, Yamaha, etc.
DeleteA project that's been on and off for a while but looks very interesting is the multiwind https://hackaday.io/project/159481-multiwind
DeleteHello there, question, I've just got this USB expression device made by the guys that make the breath controller, -you connect the expression pedal and the usb comunicate with the computer to change expression vaues- I bought this cause its cheaper than the bc device -199- dlls. the usb expression cost 59 dlls. so, as I have a yamaha bc1 was wondering if I can reprogram the usb thumb instead of act as 'expression' controller to a 'breath; controller, I think theres some programming stuff that could be made to change those parameters, any help? thank you...
ReplyDeleteCan you say exactly which "USB expression device" you are talking about and who "the guys that make the breath controller" are? If it's recent, it wouldn't surprise me if it can be configured to send different MIDI messages, but without knowing what device you are talking about I don't know.
Delete